

How To Take Apart A Keurig Mini To Clean
-
-
Unplug machine from the mains electricity.
-
Record downwards the h2o refill comprehend.
-
-
-
Remove two phillips screws on the base of operations.
-
-
-
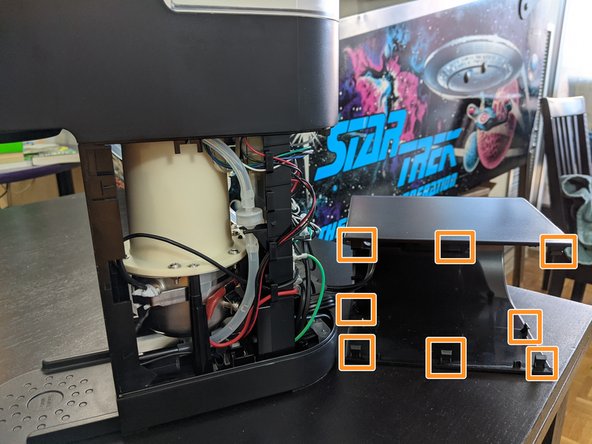
Insert pry bar and slowly piece of work your way down the side of unit of measurement popping out the clips.
-
Repeat on the other side.
-
-
-
This clip on the rear of the unit is particularly catchy to pop off, only popped off when the other chassis clips were all removed and held open, while pulling it backwards.
-
There are 3 clips down each vertical side, 2 on the pinnacle middle and ii on the lesser middle.
-
This is where the screws screw in to. They need to be unhooked from the base to exist able to pull it backwards and off.
-
Getting the chassis off was particularly catchy, I recommend borrowing a second pair of hands if you can.
-
-
-
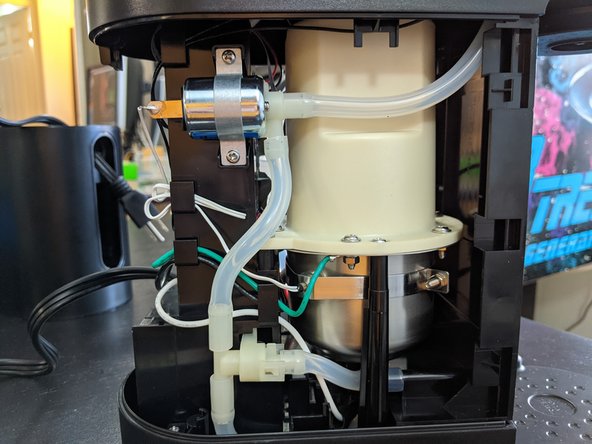
Before separating the top section, unplug the h2o pump from the rear circuit board.
-
-
-
Flip the unit upside down.
-
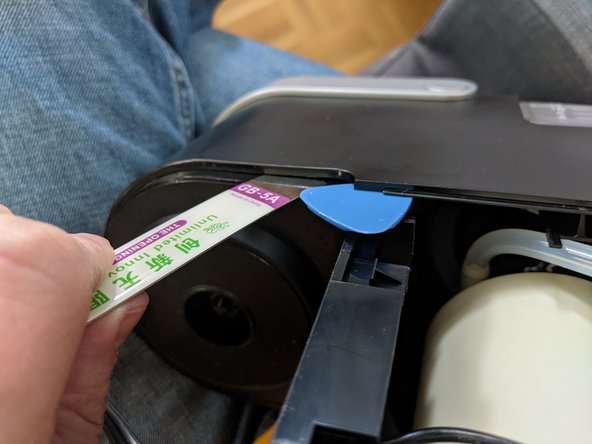
The top of the unit of measurement is held in by ane clip near the circuit board and clips around the cup spout
-
Belongings the unit upside down, work pry bars around the curve and the top volition pop off.
-
One time the front is popped off, yous tin can wiggle the top department and it will separate from the base
-
-
-
The ribbon cable for the lid is glued in place and the lid can non be removed unless there is slack to pull.
-
Gently option at the silicon glue blob and information technology will come up up at the edges. Slide it down the ribbon cablevision.
-
-
-
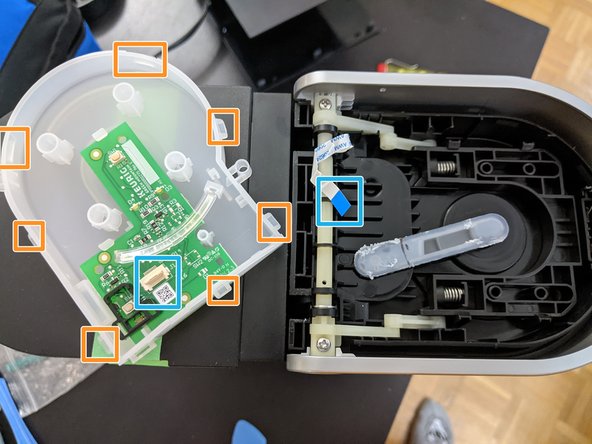
There are vi clips around the curved department and four clips along the hinge holding the pinnacle of the chapeau in place.
-
Apply pry bars around the curved section of the lid until the center can be pulled out.
-
Once the curved section has popped off, the lid will still be attached at the swivel section. Close the chapeau and pry along the back of the hinge department, pushing the hat top away from the h2o refill area until the lid pops off.
-
-
-
The white box has clips around the edge which tin can be hands popped off with a pry bar.
-
Remove the K and power buttons. There are four springs nether the K button to stabilize it.
-
Under the white condom cover it's the small latching connector for the lid ribbon cable.
-
-
-
Side views of the internals.
-
The lid ribbon cable has a little clip in the top of the chassis to keep it tucked abroad.
-


Embed this guide
Choose a size and copy the code below to embed this guide as a modest widget on your site / forum.
Preview

Source: https://www.ifixit.com/Teardown/Keurig+K-Mini+Teardown/141348
Posted by: abneyhimme1997.blogspot.com
0 Response to "How To Take Apart A Keurig Mini To Clean"
Post a Comment